
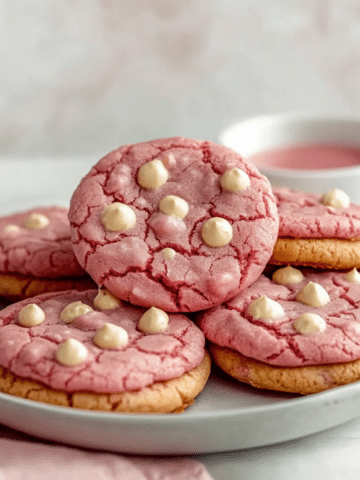
There's nothing quite like baking a batch of beautifully decorated Valentine's Day cookies to show someone you care. These soft, buttery cookies are topped with a smooth, glossy royal icing that’s perfect for customizing with festive designs. Whether you're making these for a loved one, friends, or even just yourself, these cookies are as delicious as they are stunning.

I first tried making these cookies as a creative gift for my family, and it quickly turned into an annual tradition. With their sweet flavor and endless decorating possibilities, they’re the perfect way to celebrate the season of love. Let’s dive into why these cookies are sure to become your Valentine’s Day favorite.
Why You’ll Love These Simple Valentine’s Day Cookies With Royal Icing Recipe
Get ready to fall in love with a baking project that’s as fun to make as it is to eat. These Valentine’s Day cookies offer everything you could want in a festive treat.
First, these cookies are surprisingly easy to make. With just a handful of pantry staples and a few decorating tools, you can create a bakery-worthy batch of cookies right in your own kitchen.
They’re also a fantastic activity for all ages. Whether you’re baking with kids or hosting a cookie-decorating party, these cookies bring people together for a fun and creative experience.
Not to mention, they’re endlessly customizable. From hearts and flowers to messages of love, you can tailor these cookies to suit your style and preferences. The royal icing provides a smooth canvas for your imagination to run wild.
Best of all, they taste just as good as they look. The cookies are soft with just the right amount of sweetness, while the icing adds a touch of elegance without overpowering the flavor.
Ingredients Notes

The key to these Valentine’s Day cookies lies in using simple, high-quality ingredients that come together for a perfect balance of flavor and texture. Here’s what you’ll need to make them shine:
The base of these cookies is unsalted butter. Be sure to use it at room temperature for easy mixing and a soft, tender crumb. If salted butter is all you have, omit the added salt in the recipe.
Granulated sugar gives the cookies their sweetness. Stick to white sugar for a clean, neutral flavor that complements the buttery richness.
All-purpose flour forms the foundation of the dough. Measure it carefully to avoid dense cookies—spoon the flour into your measuring cup and level it off with a knife.
For the icing, powdered sugar is essential for achieving the smooth, glossy finish of royal icing. Sift it beforehand to avoid any lumps in your icing.
Finally, you’ll need gel food coloring to create those vibrant Valentine’s Day hues. Gel colors are ideal because they provide intense color without thinning the icing.
If you have a rolling pin and heart-shaped cookie cutters, you’re all set to get started! Piping bags and tips are helpful for decorating, but you can also use zip-top bags with the corners snipped off.
How to Make These Simple Valentine’s Day Cookies With Royal Icing Recipe

Making these cookies is as enjoyable as decorating them. Here’s a step-by-step guide to ensure your cookies turn out perfectly every time:
Start by creaming the butter and sugar together until light and fluffy. This step is crucial for creating a soft, tender cookie base, so don’t rush it.
Next, add your egg and vanilla extract, mixing until well combined. The egg provides structure, while the vanilla adds a warm, sweet aroma that pairs perfectly with the cookies.
Gradually mix in the flour and a pinch of salt, forming a smooth dough. If the dough feels too sticky to work with, chill it for 20-30 minutes to firm it up.
Roll out the dough on a lightly floured surface to about ¼-inch thickness. Use your heart-shaped cutters to stamp out as many cookies as possible, re-rolling the scraps as needed.
Bake the cookies on a parchment-lined baking sheet at 350°F (175°C) for 8-10 minutes, or until the edges are just set. Avoid overbaking for a soft texture. Let the cookies cool completely before decorating.
To make the royal icing, whisk together powdered sugar, a small amount of water, and meringue powder (or an egg white). The icing should be thick enough to hold its shape but thin enough to spread easily. Divide the icing into bowls and add your desired colors.
Use piping bags or zip-top bags to decorate your cookies. Outline each cookie first, then fill in the centers. A toothpick can help spread the icing into tight corners or smooth out any air bubbles. Let the icing dry completely before stacking or packaging the cookies.
Storage Options
These cookies are great for making ahead, whether for gifting or enjoying throughout the week.
Store undecorated cookies in an airtight container at room temperature for up to one week. This allows you to bake in advance and decorate when you’re ready.
Decorated cookies can also be stored at room temperature in a single layer or between sheets of parchment paper to protect the icing. They’ll stay fresh for 4-5 days.
If you want to freeze them, place the undecorated cookies in an airtight container or freezer bag for up to three months. Simply thaw at room temperature before icing.
Variations and Substitutions
One of the best things about these cookies is their versatility. Here are a few ideas to make them your own:
- Swap out the vanilla extract for almond or lemon extract for a unique flavor twist.
- Add a pinch of cinnamon or nutmeg to the dough for a subtle spice.
- Use natural food coloring made from beet or raspberry juice for a vibrant, all-natural look.
- Experiment with different shapes—stars, flowers, or initials can all add a personalized touch.
- Sprinkle the wet icing with edible glitter or sanding sugar for an extra festive flair.
No matter how you customize these cookies, they’re sure to bring joy to anyone who receives them. So grab your rolling pin and let the baking fun begin—your Valentine’s Day masterpiece awaits!
PrintSimple Valentine’s Day Cookies With Royal Icing Recipe

This simple Valentine’s Day Cookies with Royal Icing recipe is the perfect sweet treat to celebrate love! Made with basic ingredients, these cookies are easy to bake and decorate, making them ideal for festive occasions or gifting.
- Prep Time: 20 minutes
- Cook Time: 10 minutes
- Total Time: 30 minutes
- Yield: 24 cookies 1x
- Category: Dessert
- Method: Baking
- Cuisine: American
- Diet: Vegetarian
Ingredients
- 2 ½ cups all-purpose flour
- ½ teaspoon baking powder
- ¼ teaspoon salt
- 1 cup unsalted butter, softened
- ¾ cup granulated sugar
- 1 large egg
- 1 teaspoon vanilla extract
- ½ teaspoon almond extract (optional)
- Royal icing (powdered sugar, meringue powder, water, food coloring)
Instructions
- Preheat the oven to 350°F (175°C) and line baking sheets with parchment paper.
- In a medium bowl, whisk together flour, baking powder, and salt.
- In a large bowl, beat the softened butter and sugar until fluffy. Mix in the egg, vanilla extract, and almond extract.
- Gradually add the dry ingredients to the wet ingredients and mix until a dough forms.
- Roll the dough to ¼-inch thickness on a floured surface and cut out heart-shaped cookies.
- Place cookies on prepared baking sheets and bake for 10-12 minutes or until edges are lightly golden.
- Allow cookies to cool completely before decorating with royal icing.
- Prepare royal icing by mixing powdered sugar, meringue powder, and water until smooth. Divide and color as desired.
- Pipe and decorate the cookies with icing, letting it set completely before serving.
Notes
- Ensure the dough is chilled if it becomes too soft to handle.
- Add food coloring to royal icing for vibrant and fun designs.
- Store cookies in an airtight container for up to a week.
Nutrition
- Serving Size: 1 cookie
- Calories: 120
- Sugar: 8g
- Sodium: 30mg


Leave a Reply